If you want need a 64-bit version of this module for Google App Engine, or another project, you can run into a couple of issues. Sticking to 32-bit versions of Python and PIL avoids these issues so that may be the best direction for newbies.
The downloads on the PIL site are for 32-bit versions of Python which means that you hit runtime issues as soon as the Python script files attempt to load the 32-bit libraries into 64-bit Python. Annoyingly the installer is unaware of the architecture for the Python installation it finds and will leave you with a broken PIL install. Just uninstall it from Control Panel. My first thought was to try an build from the sources but I figured someone has run into this problem.
After some searching I found a site which offers pre-built versions of many Python modules for 64-bit architectures including PIL. If you are in any way concerned about performance, or security a better solution might be to build from source or use versions from a company offering supported versions.
I downloaded the version for Python 2.5 and then discovered that it would not install. What is interesting is that the 32-bit installer was able to find my 64-bit Python, but the 64-bit installer was unable to find it.
After some more searching it turns out that the installer takes it’s cue from a key in the registry and the Registry virtualization in Windows x64 was confusing it. To resolve the issue I had to export the “HKLM\SOFTWARE\Wow6432Node\Python\PythonCore\2.5” key, remove the “Wow6432Node\” string using a text editor, and re-import the key so that it was at “HKLM\SOFTWARE\Python\PythonCore\2.5”.
After doing this the 64-bit installer for PIL detected my Python installation and I was up and running.
Van Lindberg recently tweeted a link to some tips on how to attend a conference. The advice in that article is pretty sound for a business person looking to build up their network to find sales opportunities, but it doesn't cover any PyCon-specifics.
After a little thinking I've come up with my own list of tips for new PyCon attendees:
Attend some open space sessions
Open spaces are now happening at a lot of conferences but the PyCon ones have been the best I've seen. These are ad hoc discussions on a common topic with participants joining and leaving whenever they want. These sessions are a lot of fun and you'll make a lot of friends in the process. Even if you aren't the most talkative person, or know little about a subject, you are free to just hang out and listen.
Whilst there is a page on the PyCon website for these sessions, it is normally best to check the boards outside the rooms assigned to open space use. You should also monitor the Convore backchannel and #pycon on Twitter.
If you don't see any open space sessions related to your favourite topic just post a session in one of the available time slots. In almost all cases some likeminded individuals will turn up.
Scheduled talks are normally recorded for viewing later so I'd recommend that you try to decide ahead of time which talks are must see, and which ones could be skipped. That way you can make the most of the open space sessions as some of these will overlap with scheduled talks, especially on Saturday and Sunday.
Help the PyCon staff
Putting on a conference PyCon is an enormous effort. They are often looking for runners and other helpers. Spending a little time helping out introduces you to many interesting people and you'll probably learn a bit too about how conferences run.
These are very short talks on a variety of Python-related subjects scheduled at the beginning and end of conference days. If you have something to say to the community they are a good way to let people know about your project or passion. For everyone else they are a good way to find out about lesser known projects, and they are often quite humorous.
Go off track
PyCon like many other conferences has tracks with related content and there are 10 virtual tracks for 2011. These are really helpful for finding things that you are likely to be interested in, but sometimes it is good to check out something a little bit different.
In particular, veteran PyCon speakers like Alex Martelli, David Beazley, and Raymond Hettinger fill rooms each year and are always worth watching.
Chat with presenters
On the topic of presenters there are a lot of opportunities to talk to presenters at PyCon, either right after a talk, or later at the conference. If you have questions on their area of expertise or feedback on their talk it is worth taking some time to talk to them.
Spend time on things that are valuable to you
Sometimes you'll end up in a talk or open space session that isn't exactly what you expected. It is best if you go to something more to your taste than waste your time on a talk that is too basic or not as described. Sometimes this can be a little difficult if a session is packed with people, but you can do things to make your exit a little bit more comfortable.
First of all if you have an inkling that you are going to want to leave a talk don't pick a seat in the middle of a row. Instead sit somewhere that that has easier access to the exit at the back of the room. If there are video cameras in the talk you might not want to be "the dude that left in the middle of a talk". In reality you will likely not be noticed as the cameras are directed at the speaker.
Second, make sure to pack up your laptop and other things in your bag before exiting. It's kind of annoying to get clobbered with a laptop as someone exits past you. The same thing goes for anyone sitting in the row. Don't make unnecessary obstacles for anyone that gets out. Move your power cord and move closer to power strips rather than pulling them out of place.
Find a group for dinner in Atlanta
Watch the Convore and Twitter for information on groups who are going out for the evening in Atlanta. In many cases an open space session will continue over dinner!
Don't have too good a time at night
It is way too easy to have a good time on Friday and Saturday nights, but don't stay out too late or get too hammered. This seems like a bit silly but you need quite a bit of energy to make it all the way through a conference like PyCon.
I'm sure there are many things that I've missed here. Please post other tips on Twitter under the #pycon hash tag, on your blog, or post a comment below for others to read.
Working with Win32 listbox controls is fairly simple but the code can be quite convoluted and get tedious after a while. I decided to use the WTL library to simplify some listbox handling code but it wasn't initially obvious how to do this. Hopefully this blog post will help someone else understand the basics.
Manual message processing
The majority of Win32 programming involves working with messages of various types that are basically #defines in header files. The Listbox control responds to messages like these:
LB_GETCURSEL (get the selected item)
LB_DELETESTRING (delete a string)
LB_INSERTSTRING (add a string)
..but you also have to make sure you use the correct WPARAM and LPARAMs.
The resulting code for adding an item to a Listbox looks like this:
As you can see this requires a lot of work that I’ve grown tired of with years of C# coding.
Simplifying with WTL
It is best to thinking of simplification here with a view to the long term. You are writing C++ so this is not as straightforward as WinForms or WPF.
First of all you need to create a member variable in your window class. I'm assuming you have installed the WTL AppWizard into Visual Studio and have created a Dialog application, but the steps are similar for other types of window. The code looks something like this:
class CMainDlg : public CDialogImpl<CMainDlg>, public CUpdateUI<CMainDlg>, public CMessageFilter, public CIdleHandler
{
private:
    CListBox m_ListBox;
public:
    enum { IDD = IDD_MAINDLG };
....
As you can see we have private called m_ListBox that we can reference elsewhere. Next an instance of CListBox needs to be attached to a Listbox that has been added to your dialog resource file. You do this in the OnInitDialog() method:
The IDC_LIST1 parameter is the name defined in my resource file and messages are now being routed between the instance variable and the actual control.
Now in the event handling code it is possible to call the AddString() method without having to worry about message types:
I recently replaced my aging Dell PowerEdge 830 server with a newer custom desktop and needed to migrate a number of old virtual machines. For the last few years I’ve been a happy user of VMware Server running atop Ubuntu Server and I figured it would be easiest to stick with that configuration.
So off I went with the usual Ubuntu 10.10 install and popped over to vmware.com to grab the latest virtualisation bits. It was then that I noticed that VMware Server (formerly GSX Server) is no longer being updated and users are recommended to upgrade to VMware ESXi.
From what I knew about the ESX product it had very specific requirements for installation, only supporting high end storage and a limited selection of NICs. It would seem that I needed to look at some of the Linux VM options like KVM or Xen, but it would be a pain to convert VMs over and it wouldn’t be straightforward to run these on my other computers.
Sticking with VMware
I went to Google and did a little research on installation of the latest VMware server version on unsupported hardware. VMware offer ESXi, a free Hypervisor, which is the base for their VSphere products. This is the recommended upgrade path for VMware Server users. You just register on their site and receive a free serial number.
Hypervisors like ESXi run directly on the hardware rather than on top of an operating system. This results in better performance and hardware utilisation.
A failed installation
The installer is supplied as an ISO image which is designed to work on supported hardware. As I found out, getting this to work well on unsupported hardware was problematic.
First of all I ran into a failure from what looks like a virtual disk driver (“vmkctl.HostCtlException Unable to load module /usr/lib/vmware/vkmod/vmfs3: Failure”). Whilst browsing many clueless forum responses I noticed a reply that mentioned Realtek network adaptors being a problem. Many motherboards including the Gigabyte GA-EP43T-USB3 in my machine use this brand of NIC, but VMware favour Intel cards. To find out if network card halted the installer I dropped into the BIOS setup and disabled the onboard network card.
On the next boot the ESXi installer let me pick a hard disk for the install but then blew up with a media error. It turns out that the installer has problems with your garden variety of DVD drive and people have more success with installation from USB flash drives.
I now had 2 problems: one with hardware (the NIC) and the other with software (the installer). I needed a new NIC and was able to pick up an Intel Pro/1000 PT Server card on Amazon with quick delivery. This was easy to install and it worked on first boot so I only had to get a USB installer working.
The first method I tried was a custom bash script called mkesxaio which enabled me to create an installation of VMware on a USB drive, but failed to create an installer. It was cool to be able to run ESXI directly from Flash memory as many people will want to do, but I wanted a solution that was safe from my cat. This bootable version did let me validate the performance of the new Intel NIC.
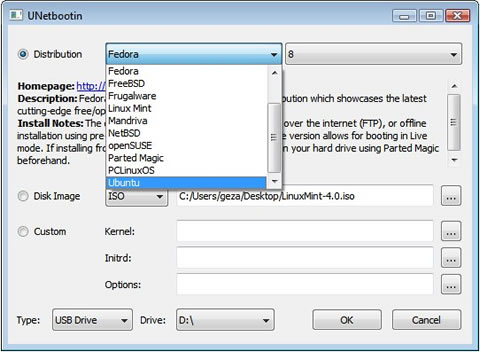
So it was back to Googling for other recommendations on creating a boot disk. I finally found a reasonable one by Ivo Beerens but I didn’t want to mess with Syslinux. Instead I used the weirdly named UNetbootin to install the VMware ESXi ISO image to my USB drive. This meant I could follow Ivo’s later steps to configure the drive.
The installer wants to validate some configuration that it expects on the CD so it is important to follow the directions around creation of a mod.tgz that sets the mtools_skip_check variable. Otherwise you have to drop to the shell each time you want to run the installation.
Kickstart files are used to automatically start the installation and I wasn’t able to find a configuration that let me boot the regular installer. It is very important that you have drives in the computer that do not have important data. The ks.cfg file contains a line specifying the drive to install to that is dependent on which SATA connection you are using. In short make sure the drive you want to use for the installation is the first drive, or modify the script.
At this point I had a USB installation disk that would automatically boot, provision ESXi, and then reboot to a fully working installation.
Final configuration
After installation I was able to access the console to verify network connectivity and enable some useful settings:
SSH remote access
Local troubleshooting mode
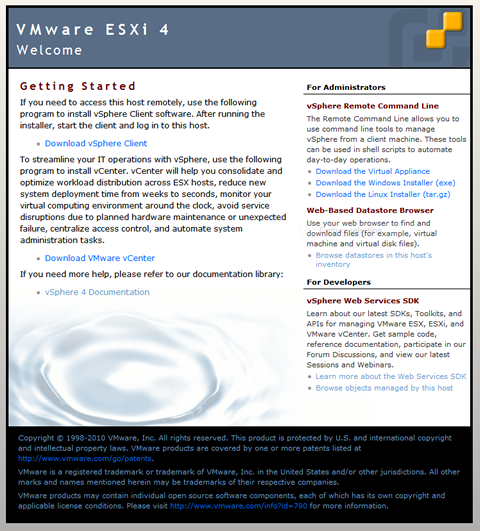
When I connected the IP address assigned to the machine I was presented with a the default server information and links to the vSphere client.
After a bit more work than I expected I now have a newer more powerful VMware environment for testing new tools, that will support newer guests like Windows Server 2008 R2. After a little bedding in time I’m going to migrate my existing VMs and get rid of the old Dell.
 Expat Coder