 Expat Coder
Installing VMware ESX 4.1 from a USB flash drive on unsupported hardware
I recently replaced my aging Dell PowerEdge 830 server with a newer custom desktop and needed to migrate a number of old virtual machines. For the last few years I’ve been a happy user of VMware Server running atop Ubuntu Server and I figured it would be easiest to stick with that configuration.
So off I went with the usual Ubuntu 10.10 install and popped over to vmware.com to grab the latest virtualisation bits. It was then that I noticed that VMware Server (formerly GSX Server) is no longer being updated and users are recommended to upgrade to VMware ESXi.
From what I knew about the ESX product it had very specific requirements for installation, only supporting high end storage and a limited selection of NICs. It would seem that I needed to look at some of the Linux VM options like KVM or Xen, but it would be a pain to convert VMs over and it wouldn’t be straightforward to run these on my other computers.
Sticking with VMware
I went to Google and did a little research on installation of the latest VMware server version on unsupported hardware. VMware offer ESXi, a free Hypervisor, which is the base for their VSphere products. This is the recommended upgrade path for VMware Server users. You just register on their site and receive a free serial number.
Hypervisors like ESXi run directly on the hardware rather than on top of an operating system. This results in better performance and hardware utilisation.
A failed installation
The installer is supplied as an ISO image which is designed to work on supported hardware. As I found out, getting this to work well on unsupported hardware was problematic.
First of all I ran into a failure from what looks like a virtual disk driver (“vmkctl.HostCtlException Unable to load module /usr/lib/vmware/vkmod/vmfs3: Failure”). Whilst browsing many clueless forum responses I noticed a reply that mentioned Realtek network adaptors being a problem. Many motherboards including the Gigabyte GA-EP43T-USB3 in my machine use this brand of NIC, but VMware favour Intel cards. To find out if network card halted the installer I dropped into the BIOS setup and disabled the onboard network card.
On the next boot the ESXi installer let me pick a hard disk for the install but then blew up with a media error. It turns out that the installer has problems with your garden variety of DVD drive and people have more success with installation from USB flash drives.
I now had 2 problems: one with hardware (the NIC) and the other with software (the installer). I needed a new NIC and was able to pick up an Intel Pro/1000 PT Server card on Amazon with quick delivery. This was easy to install and it worked on first boot so I only had to get a USB installer working.
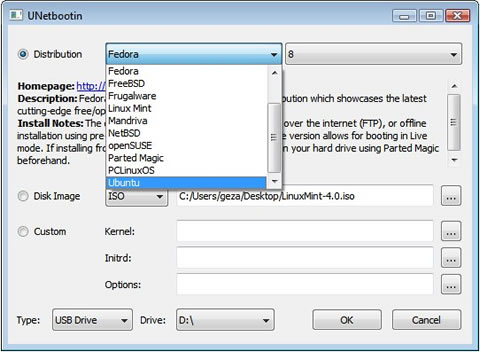
Creating a USB installation disk
My Google searches had taken me over to the vm-help.com forum, and I found a lot of useful custom installation and hardware/driver support information.
The first method I tried was a custom bash script called mkesxaio which enabled me to create an installation of VMware on a USB drive, but failed to create an installer. It was cool to be able to run ESXI directly from Flash memory as many people will want to do, but I wanted a solution that was safe from my cat. This bootable version did let me validate the performance of the new Intel NIC.
So it was back to Googling for other recommendations on creating a boot disk. I finally found a reasonable one by Ivo Beerens but I didn’t want to mess with Syslinux. Instead I used the weirdly named UNetbootin to install the VMware ESXi ISO image to my USB drive. This meant I could follow Ivo’s later steps to configure the drive.
The installer wants to validate some configuration that it expects on the CD so it is important to follow the directions around creation of a mod.tgz that sets the mtools_skip_check variable. Otherwise you have to drop to the shell each time you want to run the installation.
Kickstart files are used to automatically start the installation and I wasn’t able to find a configuration that let me boot the regular installer. It is very important that you have drives in the computer that do not have important data. The ks.cfg file contains a line specifying the drive to install to that is dependent on which SATA connection you are using. In short make sure the drive you want to use for the installation is the first drive, or modify the script.
At this point I had a USB installation disk that would automatically boot, provision ESXi, and then reboot to a fully working installation.
Final configuration
After installation I was able to access the console to verify network connectivity and enable some useful settings:
- SSH remote access
- Local troubleshooting mode
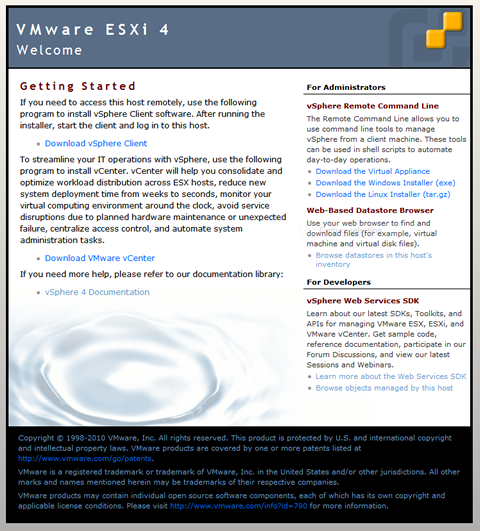
When I connected the IP address assigned to the machine I was presented with a the default server information and links to the vSphere client.
After a bit more work than I expected I now have a newer more powerful VMware environment for testing new tools, that will support newer guests like Windows Server 2008 R2. After a little bedding in time I’m going to migrate my existing VMs and get rid of the old Dell.
Tagged with automated, installation, usb and vmware.